
In biological photography, getting the color temperature right isn’t just about making things look “pretty.” It’s about data integrity. If your white balance is off, your staining intensity looks wrong, and your peer-reviewed paper suddenly looks a lot less credible.
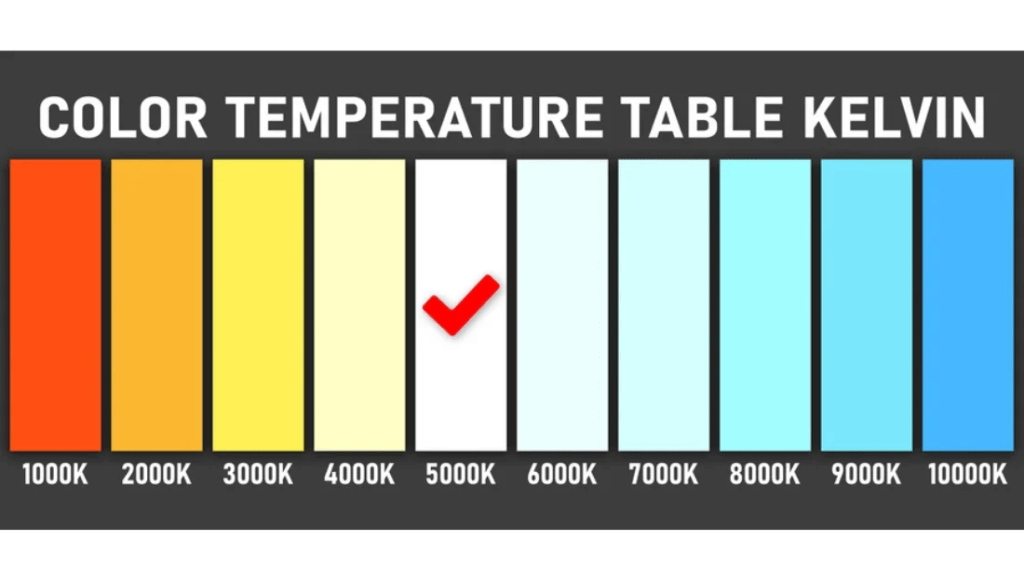
For most biological sample photography, 5000K–5600K (daylight-balanced light) is the best choice.
This is the industry standard for “Daylight.” It’s neutral, it’s crisp, and it doesn’t lean too hard into the yellows or the blues. Most high-end imaging software and cameras are calibrated to this baseline, meaning less time fighting with sliders in post-production.
Expert Tip: Even with a 5600K light, always perform a “Manual White Balance” using a 18% neutral gray card or a clear area of the slide. This tells your camera: “Hey, this is what true white looks like in this specific room.”
Why 5000K–5600K Is the Gold Standard?
Color temperature, measured in Kelvin (K), defines the spectral bias of your light. In biological research, we lean on 5600K (Daylight) because it offers a neutral spectral power distribution. This ensures that the whites are true, and the reds, blues, and greens are balanced.
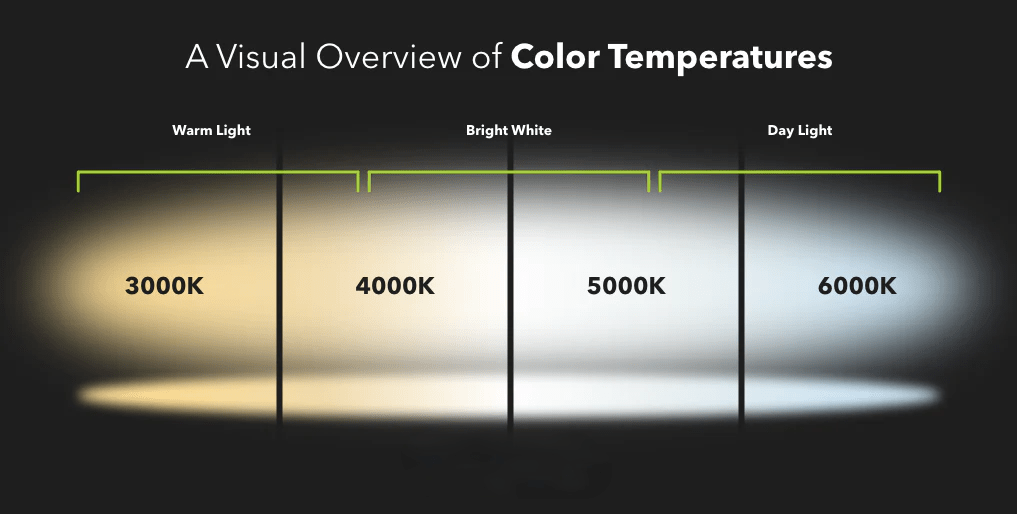
- 3200K (Tungsten/Halogen): Too warm. It adds a heavy yellow/orange cast that masks the subtle purples of Hematoxylin.
- 5600K (Professional LED/Flash): The “Neutral Zone.” It aligns with the native white balance of most CMOS/sCMOS sensors.
- 7000K+ (Cool LED): Too blue. This flattens the image and “washes out” organic reds, making living tissue look necrotic.

In biological photography, this matters because light color directly affects how stains, tissues, and cellular structures appear in your final image.And in science, color isn’t decoration — it’s data.
- H&E stains look accurate (pink stays pink, nuclei stay purple)
- Tissue contrast remains realistic
- White balance is easier to control
- Images are more reliable for publication
- Less post-processing correction is needed
Daylight-balanced imaging is not arbitrary. It corresponds closely to standardized reference illuminants defined by the International Commission on Illumination (CIE).
In biomedical research environments, reproducibility standards emphasized by institutions such as the National Institutes of Health(NIH) require controlled and repeatable imaging conditions. Lighting consistency is part of methodological integrity.
The Royal Microscopical Society (RMS) has also emphasized that standardized illumination is essential for comparable microscopy imaging results.
Color temperature alone is insufficient–The Critical Data Point: CRI and Spectral Quality

For biological imaging, the following technical parameters are recommended:
- Color Rendering Index (CRI) ≥ 90
- Preferably CRI ≥ 95 for publication-grade imaging
- Flicker-free output (<1% modulation depth)
- Stable correlated color temperature (CCT deviation ≤ ±100K)
You can set a $20 LED to “5600K,” but the photo will still look muddy. This is because of the Color Rendering Index (CRI).
In biological photography, CRI must be 95 or higher. Cheap LEDs often have a “cyan gap” or lack “Deep Red” (known as the R9 value). If your R9 value is low, your blood smears and muscle tissues will look greyish-brown regardless of your Kelvin setting.
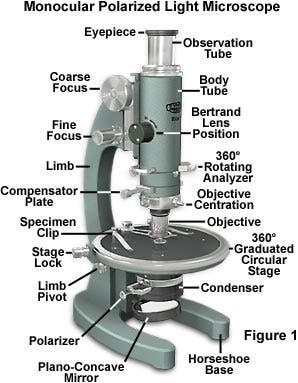
- Microscope LEDs: Modern systems (like those from Zeiss or Leica) use high-CRI 5600K LEDs. If you are using an older halogen scope, you are shooting at roughly 3200K. You must use a daylight-balancing filter to correct this physically before the light hits the sensor.
- Ring Lights: Perfect for shadowless macro work, but ensure they are Full-Spectrum. Avoid “bicolor” lights that mix warm and cool LEDs, as they often create inconsistent spectral spikes.
| Light Type | Best For | The Catch |
| Microscope LED | High-mag cellular imaging | Often “spiky” in the blue spectrum; requires a green/blue filter adjustment. |
| Ring Lights | Macro photography (insects, seeds) | Can create “hot spots” or reflections on wet samples. |
| Professional LED Panels | Large organ samples or lab setups | Most reliable; look for Full-Spectrum options to ensure reds aren’t muted. |
| Old-School Halogen | Vintage setups | Stay away unless you have a Blue LBD filter. It’s naturally around 3200K (very yellow). |
“Therefore:Optimal imaging requires both 5000K–5500K color temperature and high spectral fidelity.”
Does Sample Type Change the Requirement?
While 5600K is the baseline, the physical properties of your sample—specifically its opacity and reflectance—require different hardware approaches.
| Sample Category | Recommended K | Primary Risk | Technical Requirement |
| Histology (Slides) | 5500K – 5600K | Chromatic shift in dyes | Use a Blue LBD Filter if using halogen. |
| Macro Botany/Insects | 5000K – 5400K | Lost surface detail | High CRI (>95) to capture chitin texture. |
| Live Marine Samples | 6000K | Red-light absorption | Compensate for water density. |
| Gross Anatomy | 5600K | Muted vascular reds | Must have a high R9 value (Deep Red). |
Quick Checklist for Your Next Shoot
- Check the Kelvin: Is your source between 5000K and 5600K?
- Verify the CRI: Is it >95? (If it’s a cheap LED, it’s probably <80, which kills your reds).
- Kill the Ambient Light: Don’t mix your 5600K lab light with the warm 3000K overhead office lights. Close the blinds.
- Shoot in RAW: If you mess up the color temperature in-camera, a RAW file lets you fix it later without destroying the image quality.
Final Professional Recommendation
For biological sample photography conducted in research, diagnostic, or academic environments:Use 5000K–5500K daylight-balanced illumination with CRI ≥ 90 (preferably ≥95) and stable spectral output.

