
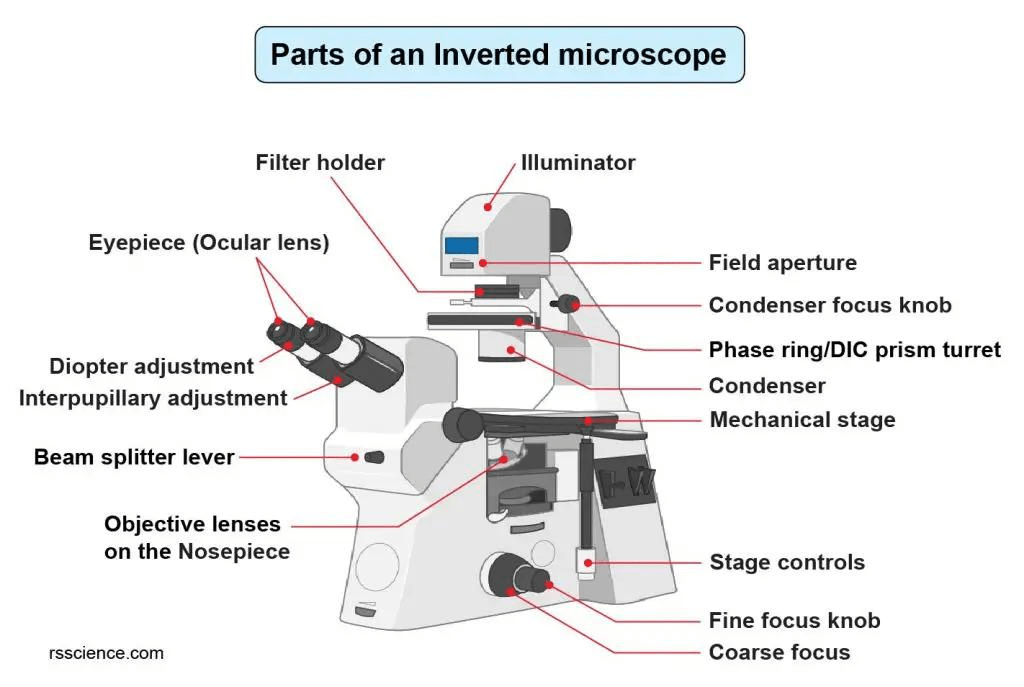
The inverted microscope is one of the best tools available for the visualization of living cells in the life science lab environment. Because the light path on the inverted microscope is directed through the bottom surface of the container from below, the quality of the images obtained will depend on the nature of the container used.
If your images look “blurry, gray, hazy, or have edges not sharply defined,” there is something wrong with either the light path, the dish itself, the phase contrast apparatus, or the focus. If your picture looks blurry, one of these five causes should be the source.
The Fatal Physical Barrier: Container and Compatibility Issues
1. The Fatal “0.17mm” Curse: Coverslip vs. Vessel Bottom Thickness
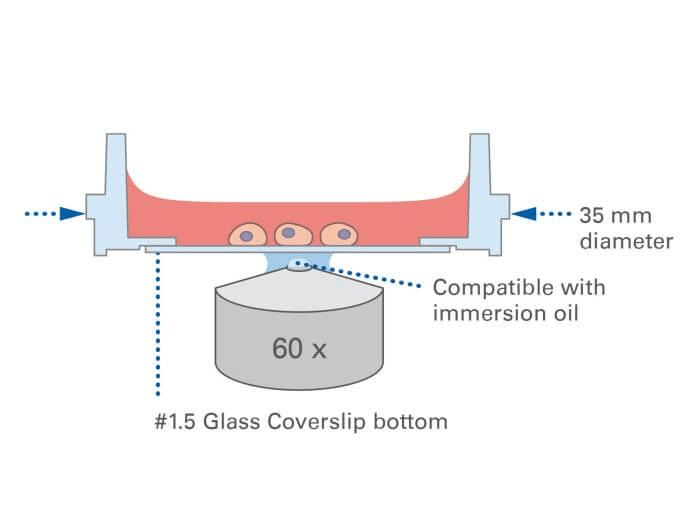
This is the most common cause of blur in inverted microscopes. Nearly all high-magnification objectives (40x and higher) are optimized for imaging in a 0.17mm thick (#1.5 coverslip).
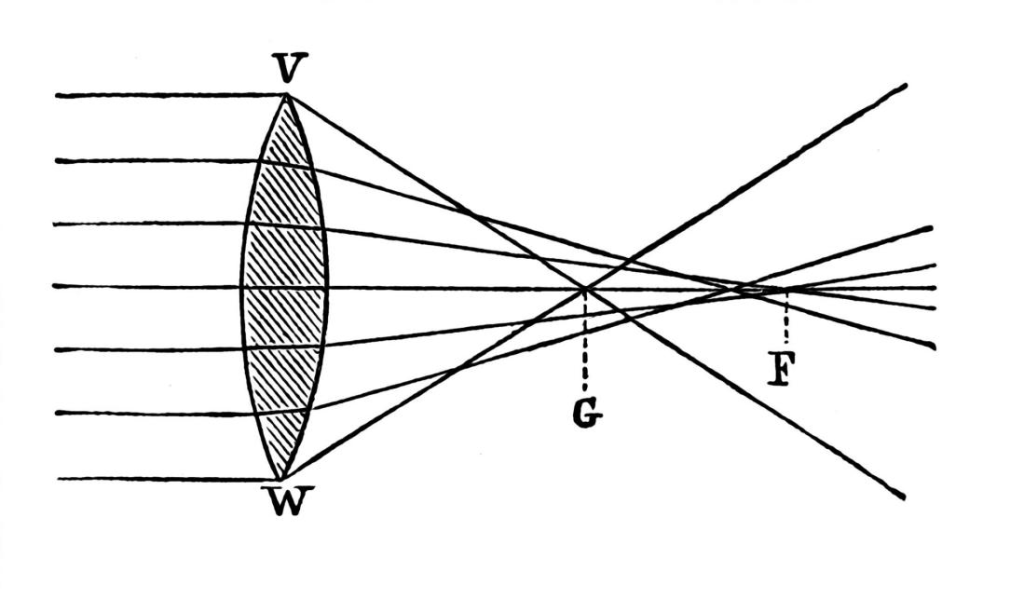
- The Mechanism: High magnification objectives (and especially those with NA > 0.7) are highly dependent on the path of refraction. They assume that light travels in a medium which is 0.17mm thick with a refractive index of 1.52 (again, a typical #1.5 coverslip).
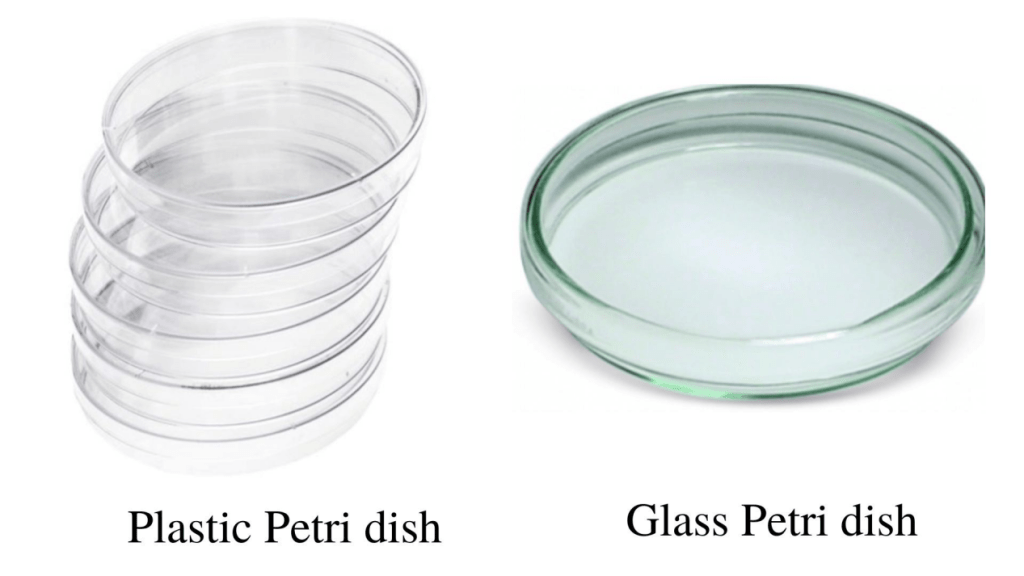
- Plastic Petri dishes: Bottom thickness = 1.0 mm. This results in significant spherical aberration, as light cannot converge to the same focal point due to the presence of a thicker “wall.”
- The Effect: Blurring is everywhere. Light cannot focus properly due to spherical aberrations, and everything looks “out of focus” as though viewed through fog.
Solutions:
- Switch Containers: For high-requirement experiments, always use Glass Bottom Dishes.
- Correction Collar: Look at your objective; if it has a rotating ring with a scale, that is a correction collar! While observing, slowly rotate the collar until the image suddenly becomes clear.
2. Specimen Placed Upside Down? (The “Classic” Mistake)

It sounds like a joke, but it happens often: placing a slide with the coverslip facing upward.
The Result: The 1mm thickness of the glass slide will inevitably make high-magnification imaging blurry.
The Rule: Under an inverted microscope, the coverslip always faces down!
“Soul Alignment” of the Optical System
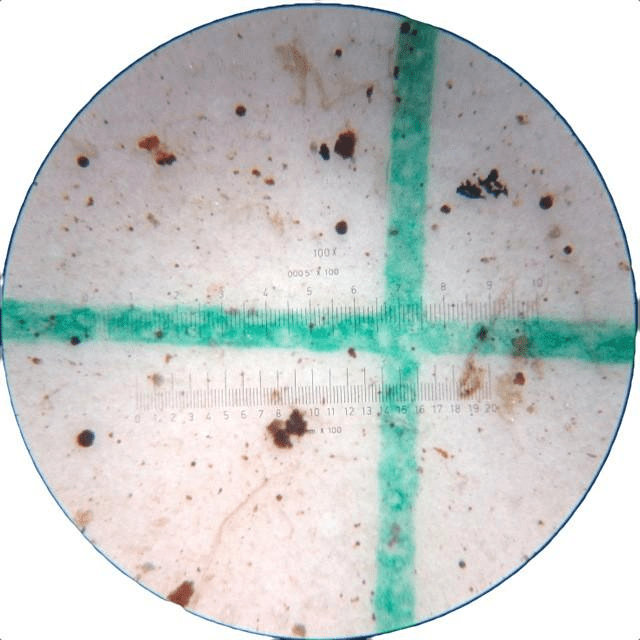
1. Phase Ring Centering: The “Soul Alignment” of Imaging
Phase Contrast mode is mostly used for observing unstained living cells. If the image is gray and lacks black-and-white contrast, the phase ring is likely “off-track.”
The Principle: Phase contrast observation requires the “light ring” in the condenser to perfectly overlap with the “black ring” inside the objective.
Check and Solution:
- Remove the eyepiece and insert a Centering Telescope.
- If the light ring and black ring you see are not overlapping, adjust the two centering knobs on the condenser.
- Like aiming a target, fit the light ring into the black ring; the image contrast will improve instantly.
2. Incorrect Condenser or Aperture Settings
The Problem: The condenser height is incorrect, or the Aperture Diaphragm is open too wide.
The Result: This generates a large amount of stray light, causing the image to appear “washed out” or gray.
The Solution: Follow the principles of Köhler Illumination. Generally, contract the diaphragm to 70%-80% of the objective’s back focal plane aperture.
“Invisible Killers” of the Lens and Environment
1. The Incubator’s “Gift”: Condensation
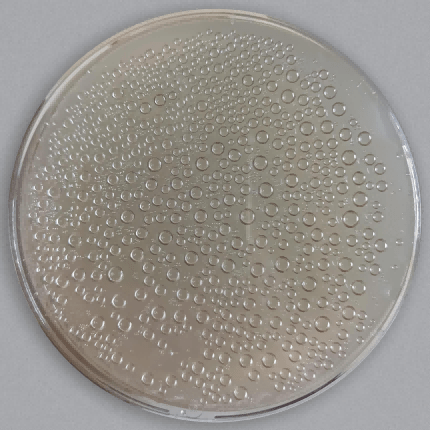
Culture dishes fresh out of a 37°C incubator are a “disaster zone” for blurry images.
The Cause: The temperature difference causes tiny condensation droplets to form on the inside of the dish lid. These droplets act like countless tiny lenses, scattering the phase contrast light from the condenser into a mess.
The Solution:
- Let it sit for a few minutes to reach temperature equilibrium.
- Under sterile conditions, quickly open the lid and wave it a few times (follow standard operating procedures).
2. “Poisoned” Objectives: Erosion by Oil, Salt, and Liquids
The objectives of an inverted microscope are located below the stage, placing them in the “danger zone” for leaks.
Dried Salt Crystals: If culture medium spills and seeps into the objective gaps, the resulting salt crust causes severe scattering.
Oil Contamination: Using a dry lens as an oil lens by mistake, or failing to clean an oil lens after use, causes residual cedar oil to harden on the lens. This creates a “soft focus filter” effect on your images.
The Check: Rotate the objective nosepiece and use a flashlight to shine light obliquely onto the front lens of the objective to check for dried stains on the surface.
3. Vibration or Stage Drift
At high magnification, the air conditioning draft or a centrifuge in the next room can blur the image.
Solution: Ensure the stage is locked and use an anti-vibration table if necessary.
Hardware Performance and Optical Limits
1. Exceeding the Optical Limit
Misconception: Increasing the size of the picture by using a software program indiscriminately.
Fact: Resolution of the image depends upon the Numerical Aperture of the objective. Exceeding the “effective magnification” will yield nothing but “empty magnification.”
Strategy:
- Adhere to the “1000x rule”: For instance, an objective with an NA of 0.65 will begin to blur when the effective magnification becomes higher than 650x (objective multiplied by eyepiece).
- Don’t use digital zooming: In case you cannot see anything at 40x, use a high-NA objective of either 60x or 100x instead of zooming on your computer monitor.
2. Illumination Problems
Aging Bulbs: As traditional halogen bulbs approach the end of their lifespan, the spectrum shifts and brightness becomes uneven.
Practical Strategy:
- Change the Bulb: Old halogen bulbs shift in spectrum, making the background look dull. Upgrading to an LED light source is recommended for constant color temperature.
- Eliminate Striations: If video recordings flicker, try setting the camera exposure time to 20ms or 40ms. This offsets the stroboscopic effect of 50Hz AC power.
The objective lens grade is too low
Not all objectives are capable of capturing cover-quality images.
Field Curvature: Ordinary objectives are clear in the center but blurry at the edges.
Chromatic Aberration: Rainbow-colored halos appear around the edges.
Solution: For high image quality, look for top-tier objectives labeled Plan Apo (Plan Apochromat).

