
With the sophistication of artificial gemstones these days, one needs more than just a jeweler’s loupe for inspection. Modern synthetics and high lead-glass fakes are made to trick the unaided eye. What is needed is a way of analyzing the behavior of the light itself on a molecular level.
For those who have a Polarizing Microscope, that means they already hold the definitive “truth detector” in their hands. Here are the definitive forensic steps involved in the process.
What’s the Difference Between Natural, Synthetic, and Glass Fake Gemstones?
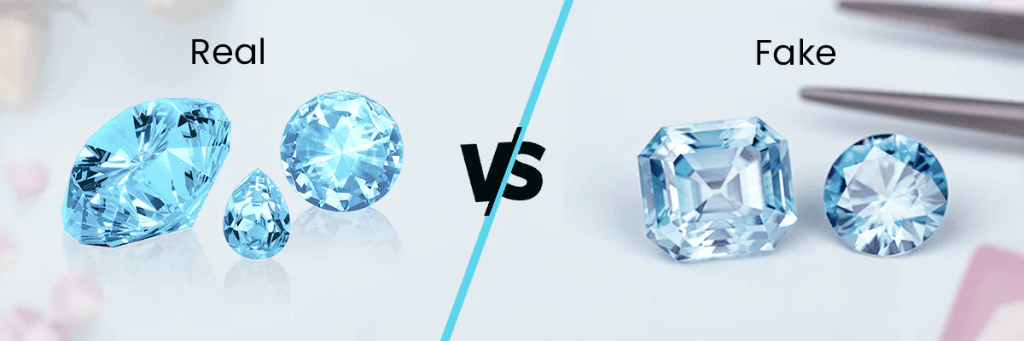
Before proceeding to analyze the gemstone using the polarizing microscope technique, it is necessary to first distinguish between the three main categories :
- Natural Gemstones: Naturally created by Mother Nature in the depths of the earth millions of years ago; each has a unique fingerprint consisting of natural inclusions and internal structures.
- Synthetic (man-made) Gemstones: Manufactured in a laboratory to replicate the composition of a natural gemstone; have uniform, manufactured internal structures, like curved growth lines, and lack any natural inclusion.
- Glass (paste) Fakes: Comprised of normal glass or plastic, without any crystalline structure of real/man-made gemstones, and usually with some air bubbles.
The polarizing microscope can identify such differences; here is how to use one.
What You Need for the Polarizing Microscope Test
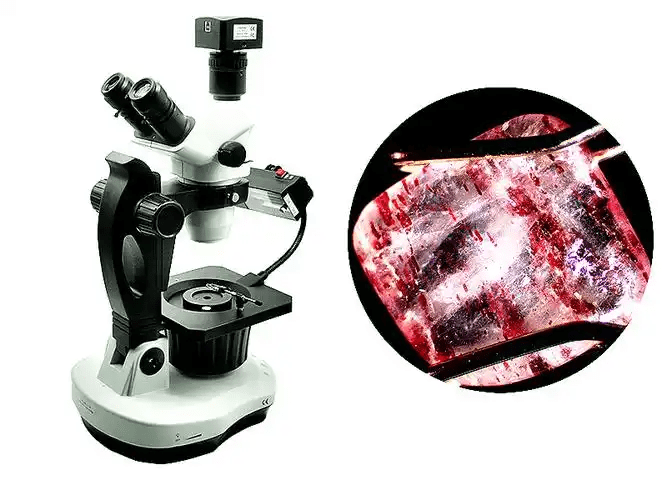
Although a polarizing microscope is a more specialized instrument, inexpensive versions (ideal for amateur use) can be easily found on online stores for $50-$200. For the experiment, you will require:
- Polarizing Microscope: Find an instrument with a 40x-100x magnification range, polarized light filter (in light source), and eyepiece (eye-piece) with another polarized filter, along with a stage (platform) where the gemstone will rest.
- Avoid using toys; try to get a simple ‘student’/’hobby’ polarizing microscope.
- Gemstone Holder (optional): Some small mechanism to stabilize the gemstone on the microscope stage. Instead of a holder, you can fix a gemstone with a piece of double-sided tape (do not damage the stone’s surface).
It is all that you will require for the experiment; no other equipment or supplies are necessary.
Step-by-Step: How to Test Gemstones with a Polarizing Microscope
First off: Set Up the Polarizing Microscope
Calibration of your “Crossed Polars” needs to be done before placing your stone on the stage.
- Light On: Adjust the brightness of the light to an average, high level.
- Crossing of Filters: Place the Polarizer filter at the bottom and the Analyzer at the top.
- Blackout: Adjust the analyzer till there is no light coming through the ocular lens.
Pro Tip: If the field is dark blue or gray, your filters are not perfectly crossed, and your identification results will be unreliable.
Phase 1: The 360° Rotation Test (Extinction)
Place your gemstone on the rotating stage. Slowly turn the stage a full 360 degrees while looking through the eyepieces.
Result A: Constant Darkness (Isotropic)
The color of the stone does not change during rotation.
- Verdict: The stone is “Singly Refractive”.
- Test results: The stone you have in front of you could either be Glass, Plastic, or a Cubic Crystal, such as Garnet or a Diamond. The stone cannot be a Ruby or Sapphire; otherwise, you would have been cheated.
Result B: The “Blinking” Effect (Anisotropic)
This rock exhibits brilliance four times while being dull four times in a single rotation.
- The Verdict: The rock is “Doubly Refractive” in nature.
- Test results: It is an actual crystal formation. High-value stones such as Ruby, Sapphire, Emerald, and Quartz would always “flash” due to their manipulation of light waves.
Phase 2: Detecting “Anomalous Double Refraction” (The Stress Test)
That is where you will find the best glass imitations that attempt to “mimic” the real stones.
There can also be a case when a glass stone is subjected to so much pressure internally due to poor processing techniques that it “bleeds” light even though it is supposed to be dark.
What you need to observe is a blurry “blink” rather than the usual smooth blink, which comes in the form of snake-like colorful stripes or what appears to be cross-hatching patterns similar to a dark spider web.
Verdict: The “smoking gun” of Glass or some melt synthetics. Gemstones do not exhibit any form of cloudiness or strain under polarized light.
Phase 3: The Conoscopic “Fingerprint” (Advanced Identification)
When it comes to separating two natural gemstones from one another (say, Natural Quartz and Glass imitation that cleared the first phase), we apply the Conoscope technique.
- Locate the spot of the stone where it becomes most brilliant.
- Apply the Bertrand Lens (alternatively, a “conoscope” sphere).
Pattern Interpretation:
- ØBlack Cross (also known as Maltese Cross): It means the gemstone is uniaxial, meaning Ruby or Quartz.
“Bullseye”: Quartz specifically.
- ØNo Pattern: Most likely Glass.
Test Results: Interpreting Your Polarizing Microscope Results
| Observation | Material Property | Likely Suspect |
| Stays Dark (360°) | Isotropic | Glass, Garnet, Diamond |
| Blinks 4 Times (Sharp) | Doubly Refractive | Natural Ruby, Sapphire, Emerald |
| Wavy/Snake-like Colors | Internal Strain | Glass Fake |
| Perfect Black Cross | Uniaxial Crystal | Natural Gemstone |
Common Pitfalls to Avoid
- Even with a polarizing microscope, incorrect techniques may yield inaccurate conclusions. Be sure to avoid these typical errors:
- No Properly Crossed Polarizers: Unless the filters are completely crossed (the field of view is dark), you will misinterpret your findings regarding anisotropic and isotropic specimens. Always ensure that your field of view is dark before starting your analysis.
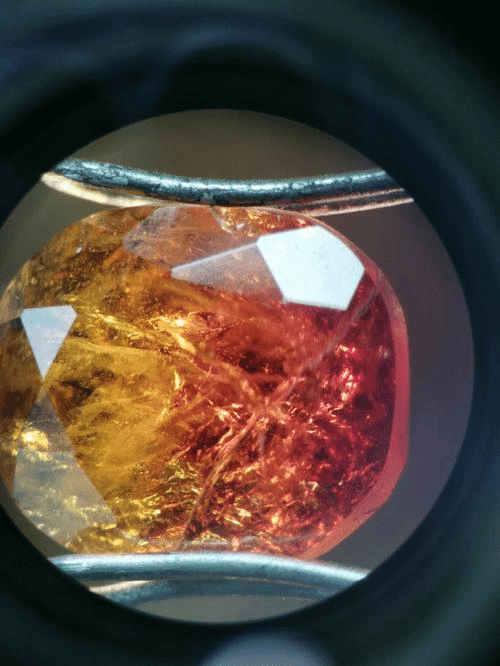
- Focus on Surface, Not Interior: Scratches on the surface may appear as inclusions. Always focus on the center of the stone to inspect its interior.
- Too Much Light: Using excessively bright light causes interference colors and inclusions to disappear. Use medium lighting.
- Failure to Rotate the Stone: Only by rotating an anisotropic stone will you see its interior; otherwise, you will conclude that the stone is isotropic, which would be glass.
Why This Method Beats Everything Else
Whereas “scratch tests” destroy the stone and “thermal probes” can be fooled by Moissanite, the Polarizing Microscope examines the atomic structure of the stone itself. This is why no imitation glass stone can reproduce the light-splitting patterns of a real ruby.
The next time you attend a gemstone fair, rely not just on your eyes but on the physics of light.
Accuracy & When to Use Other Tests
The test using the polarizing microscope has an accuracy of 98 percent for detecting fake glasses and an accuracy of 90 percent for differentiating natural and artificial gems. This is the most accurate way to detect quality fake gems that are not caught by simple tests such as the fog or loupe test.
In case you need to conduct a quick test when thrift shopping or something like that, you can always go for a quick test. However, if you are looking for exact identification, the polarizing microscope is your best bet.

